Saturday, June 30, 2012

Sunday Round Up {16}

Here we are at our 16th party. Time sure does fly :)
Here are my features
Don't you just love this table?!! I always want to save pallets, but I can never convince the other half that I need to keep them. He tells me no, there is nothing to that you NEED to make with a pallet. LOL
Check it out HERE

I want to make these earrings with all different kinds of cans. Great gift for anyone!
Check it out HERE

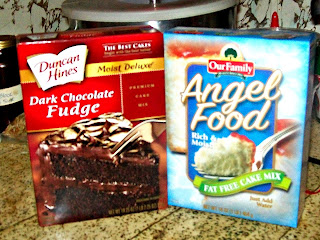
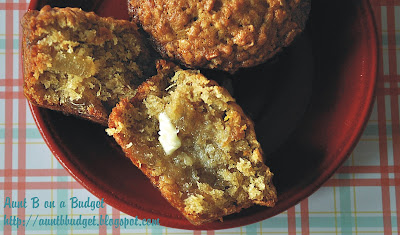
Seriously, I have been wanting to try Rhubarb and I this is how I am going to try it. Sounds absolutely amazing! Doesn't it?
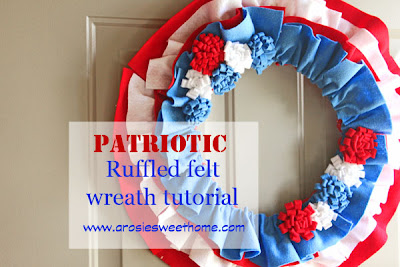
Check it out HERE


Now before we party we have a few rules.
Our rules are simple...
1: You are welcome to link up anything you'd like. 
Just keep if family friendly.
NO FOR SALE/ ETSY SHOPS/ NO LINK PARTIES
2: It has to be to a specific blog post.
3: Please link back to us, either with our button or with a back link on your blog.
4: Please follow your hosts HeatherKayla
5: Please like our facebook pages! 
LINK>>>  
LINK>>>

That's it! Told you it was simple.
If you have been featured then grab a badge. 
{Button at the bottom of my blog, along with the link party button}
Be sure to check out both blogs to see if you have been featured. 
We both choose our favorites.


Now onto the Link Party! So excited to see what you all have been up to. 


!!!FEATURES!!!

Hello EVERYONE, I am finally back, and boy oh boy I am so glad to be back! It has been a long month and my summer is just beginning. I will be gone again in two weeks, I will be making a trip back to Michigan, Indiana and Illinois. Andrew has his NATs contest coming up and has been practicing like crazy! I call it crunch time. I plan to be blogging (hopefully) while we are there and keep everyone posted on our trip. I can't wait to get back that way. I miss everything, the green grass, the humidity, my family, my horse, oh my list just keeps going! 

Alright so can you believe we are already on our 16th party?! Time sure does fly. So today I have a birthday party, a baby shower and wedding to go to. I hope I have enough time to make it to them all!

Well here are my features from every party I have missed!!!!!!!!

{11} FEATURES

Love this rug and she transformed it! Check it out HERE


I think this bag is cute! Great for a beach bag, Check it out HERE


This adds so much to the room, and I would have never thought to do this. Check it out HERE

{12} FEATURES

Seriously, I love artichokes and anything with jalapeno. Check it out HERE

I really like anything patriotic! My house would and probably will be someday with patriotic. So this headband is so cute! Check it out HERE
blue headband white bleached stars

I've been wanting to try to make a cake in a mug and will be giving this a try. Check it out HERE

{13} FEATURES

Subway art is so neat! I am thinking about putting this one on my mantel... Check it out HERE


BACON enough said :) Check it out HERE

Anything with blogspot tutorials and how tos, I pin them! This one is great for how to make a header.
Check it out HERE
sample blog header

{14} FEATURES

Need to make this wreath! Love everything about it, Check it out HERE

Have you seen all this driveway photography? It think it is so much fun. Which gives me an idea for when I make trip back to MI. Oh Rose we need to do this together!!! I think it would be a blast.
Check it out HERE
orange blooming hair driveway

I fell in love with this crown so adorable! I know a little girl that would love this for her birthday :)
Check it out HERE
Ruffled Fabric Crown


YA! I am cought up. If you were featured, please grab a button. You can find my feature button on the My buttons tab and or on the side of my blog for the Sunday round up feature button.
Come back at 4pm (mountain time) for the Sunday Round Up {16} PARTY!

xoxo
Heather


Friday, June 29, 2012

DIY Maxi Dress, by Chica es Artistica


Hi everyone! My name is Margaret and I blog over at Chica es Artistica.  
I'm so excited to be here! Today I'm going to share a tutorial for an easy maxi dress.
  I made one just like this for my mom (with different fabric of course!) for Mother's Day. You can find it here.
       I was planning on going to pick up some fabric as soon as a sale started at Jo Ann's to make one for myself but I stumbled on some fabric in my "DO NOT TOUCH" bin. I was so happy to realize that I had about 3 yards of gorgeous light blue linen. *gasp* I had gotten it at a garage sale along with a bunch of other fabric for around $2. Major score.

Just so everyone knows, this dress only takes about an hour and a half to make. And it's SO easy.

Anyway, you'll need around 2-3 yards of material, a t-shirt or tank top, and elastic thread.

 I was so sad to part with think tank top I just had to get a goodbye shot.

 Anyway, begin by wrapping the fabric 1 1/2 to 2 times around yourself. If you're taller or have a longer stride, go closer to 2 times. Mark it and cut it.

Fold it in half, right sides together and sew up the side seam.

Next, take your shirt and mark where you want the skirt to start. Make sure to take into account a bit of a seam. Then cut it, making sure to be careful.


Hand wrap your bobbin with elastic thread. Using a long stitch, sew around what will become the top of the skirt.
It should look somewhat like this. Using an iron and sort of steaming around the elastic thread will cause it to bunch up a bit more. 

With the skirt inside out and the shirt right side out, insert the shirt sleeves first into the skirt. Try and line up the seam of the skirt with the back of the shirt. This will make the seam fall right smack in the middle of your butt.

To pin the skirt the shirt, gather a few inches of skirt between every pin in the shirt. The two are obviously different sizes and this will cause the gathering.

Sew them together using elastic thread in the bobbin.

When you're done it should look like this

There's a good chance it will be too long and hang really awkwardly. DON'T PANIC. We're going to fix that!

Take a moment to notice just how bad the dress looks without a belt or sash. I'm really not that big... at least I think I'm not that big...

Since mine was obviously way too long, I had to hem it a lot. Fold it up a certain length and iron it. I folded mine up one inch because I needed it to be a lot shorter. 

Decide how much shorter it needs to be and divide that number by three. If it's reasonable (less than an inch), continue the steps below. If it's more than that, fold it up a lot, iron it and sew it keep close to the edge of the skirt. Cut off the excess material at the top and continue the steps below.

Sew a stitch (with regular thread as the bobbin) that goes around. I recommend staying closer to the edge of the fabric rather than the bottom of the skirt. 

Fold it up two more times and sew again. Make sure to iron it too to create a nice hem. 
And so this is where the sash comes in. Cut a long strip of fabric about 6-7 inches wide depending on how wide you want your sash. I had to sew a few strips together to get a long enough sash. I personally recommend going long. A nice big bow looks beautiful right on your butt. 

Flip it inside out and iron it nice and flat. 

Rusty water from the iron somehow spilled on my sash and I almost had a spaz attack. 


The ends of the sash can either be just folded in and sewn or cut at an angle and sewn. 


For the angle cut, obviously cut it at an angle. 

Cut about a half inch into the seam and then the same amount at the crease in the bottom.

Fold them in and iron. 

Sew it up and wallah! Repeat on the other side with the angle facing in the same direction. 

Warning: The following contains pictures of me after hauling heavy things around outside all day and unintentionally bathing in the hose.


There were so many ants in the flowers in wasn't even funny. I got about five on my hand. Yuck.
Thanks so much for having me!
Newer Posts Older Posts Home